Mostrando las entradas con la etiqueta Tutorial. Mostrar todas las entradas

miércoles, 10 de octubre de 2018

Hosteando nuestra propia Game Jam - Parte 2

Pre-evento: Buscar socios y Sponsors

Hola!

Les traigo la primera parte de esta serie de artículos sobre cómo fue que organizamos lo que fue la ITBA Game Jam.

Lo primero que hicimos fue buscar socios y Sponsors.

¿Por qué necesitamos socios?  DINERO + DIFUSIÓN.

Cualquier evento de este estilo va a requerir plata, por más que no se de comida a los participantes, siempre va a haber algún gasto como algún banner o flyers para difundir el evento.

Una vez que definimos cómo iba a ser el evento a grandes rasgos y cuantos participantes íbamos a poder recibir, lo siguiente era buscar quienes estarían interesados en participar del evento.

Nuestros socios finalmente fueron Etermax y Fundav, además de tener algunos regalos de parte de Razer. Gracias a todos estos socios, el evento fue posible y fue tan grande como fue.

Si bien ellos fueron los que estuvieron finalmente, no fueron los únicos a los que recurrimos.

En la primera etapa del evento, uno de mis trabajos era encontrar empresas que quieran participar del evento. Algunas respondieron con mucho ánimo y otras ni respondieron los mails, esto es muy común por eso, creo que un primer consejo sería:
No tengas miedo en intentar
Nuestro contacto con Razer surgió porque les escribí personalmente por la página de Facebook y ellos justo últimamente están soportando este tipo de eventos, por eso, al escuchar la idea comenzaron las conversaciones por mails. No tengan miedo en enviar mails o mensajes a empresas grandes!

Sin embargo, hay que tener en cuenta que siempre va a ser mejor tener algún contacto dentro de la empresa que se busca. Siempre es mejor mandar un mail a alguien dentro de la empresa que a una casilla de correo genérica.

Entre las empresas a las envié mail, también incluí a las instituciones que tienen carreras o cursos con orientación en videojuegos más conocidas de Buenos Aires. Es una lástima que no hayan respondido los mails ya que el evento tal vez hubiera sido incluso más grande de lo que fue, esperemos que para la próxima estén más atentos a su bandeja de entrada de los mails y no tanto a enviar mails sobre sus cursos y promociones.

Aunque algunos podrían, para estos casos, decir que mientras más socios, mejor, siempre hay que tener en cuenta el alcance del evento y las cuestiones "políticas".

Con cuestiones políticas me refiero a las negociaciones con las empresas que potencialmente quieran involucrarse su nivel de participación en el evento. Un tira y afloje sobre qué logo aparece primero, en qué tamaño, quién se queda con los derechos de autor de lo producido en el evento, quién lo difunde, etc.

Este tire y afloje es muy variable. Podríamos catalogar las empresas en "Reservadas" y "Colaborativas".

Para dar ejemplo de una empresa "Reservadas", podemos hablar de empresas a las que le tengamos que pedir permiso para solamente mostrar  su logo junto al nuestro en caso de que quieran participar o  empresas que tengan su departamento de comunicaciones tercerizado, por lo cual uno no habla con la empresa en sí hasta que ya se hayan definido algunas cosas. Si bien esto pueden parecer detalles menores, estas pequeñas trabas se acumulan y dificultan la interacción con la empresa. En estas, el tire y afloje suele ser bastante más delicado.

Para dar ejemplo de empresas "Colaborativas" (Etermax y Fundav en nuestro caso), tenemos empresas que persiguen el mismo objetivo que el evento. Estas empresas facilitan la organización porque ambas partes están altamente beneficiadas con la realización del evento. Por lo tanto, estas empresas si bien pueden tener sus demandas, las compensan con las acciones que realizan. En estas, el tire y afloje es mucho más relajado.

En nuestro caso, un detalle no menor para mi fue que Etermax además de ser sponsor del evento económicamente, nos dio cajas de sus figuras de silicona de su juego "Preguntados" para que les regalemos a cada participante además de unos regalos de la empresa para que hagamos sorteos. Razer (sin ser sponsor) también utilizó este principio, nos regaló tazas para que les regalemos a cada participante. Estos son gestos que mejoran el evento para ambas partes ya que ellos promocionan sus empresas mientras nosotros podemos regalarle algo a cada participante.

Por nuestra suerte, pudimos alcanzar nuestras necesidades teniendo solamente socios colaborativos. Cuando detectamos que una empresa era la que tiraba, tratábamos de, en lo posible, no involucrarnos. De nuevo, esto fue por la suerte que tuvimos de poder arreglarnos con los socios que ya teníamos, de haber sido otra la situación, nos tendríamos que haber conformado con otras empresas (algunas reservadas) y aceptar sus demandas.

Para resumir, a menos que el equipo organizador sea auto-suficiente, es un vital conseguir socios para realizar el evento. En lo ideal, socios que tengan el mismo objetivo en mente, que compartan las mismas motivaciones. Hay que pensar que nosotros como organizadores tenemos recursos finitos para entregarles a los socios, tenemos que saber cómo distribuir estos recursos y saber manejar el tira y afloje dependiendo de estos.

Espero que les haya gustado esta primera parte.

Hasta la próxima.

-L

domingo, 7 de octubre de 2018

Hosteando nuestra propia Game Jam - Parte 1


Introducción
 
Hola!

Sé que hace mucho que no escribo por acá.

Entre exámenes y falta de tiempo no pude dedicarme a hacerme tiempo a realizar algo nuevo.

Aunque por otro lado, es muy probable que vuelva a retomar el proyecto de Pirate's Tycoon, me parece un muy buen concepto a explotar. Tal vez lo arranque desde cero y solo me enfoque en la parte Tycoon, quitando la parte de batallas navales para mucho más adelante.

Por otro lado, les quería comentar otra de las razones por la cual estuve tan ocupado: estuve organizando (junto con otra gente de mi facultad) la primer Game Jam de la universidad.

El evento tuvo el formato "default": 1 tarde en donde dimos talleres, charlas y se armaron los equipos y luego 72hs de puro desarrollo.

Pueden ver los juegos que hicieron acá: https://itch.io/jam/itba-game-jam

No hubo ganador ni más votado, queríamos incentivar a los equipos a que se ayuden entre ellos, que fue lo que ocurrió.

Quería dividir mis comentarios sobre la organización de este evento (tips y cosas que aprendimos) en varios artículos, dividiendo la organización antes del evento, durante el evento y después del evento.

Así que estén atentos que tanto si quieres armar un evento con un formato similar o solo te interesa saber cómo fue que organizamos esto, estos consejos tal vez les puedan servir.

Hasta la próxima.

-L

viernes, 3 de marzo de 2017

Creating a switch to change languages inside a Blog


Hola a todos, en este Post voy a explicar como crear el switch que permite cambiar entre idiomas en un Post de un Blog. Quizá hasta puedan crear una lista en vez de un botón para tener más de dos opciones aplicando casi todos los mismos pasos.

Primero hay que entender que para crear el botón se deben crear 3 aspectos distintos:

  • El botón en sí con HTML
  • El diseño del botón con CSS
  • La programación del botón con Javascript

Por suerte, todo esto se puede hacer dentro del blog mientras el blog permita la edición de HTML cuando creamos los Posts. Primero voy a explicar que se necesita:

Uno debe tener unos divisores (div) en HTML para cada uno de los distintos lenguajes, esto quiere decir que, si tenemos un texto en español y otro en ingles, debemos (En el editor de HTML) "encapsular" los textos dentro de un div de la siguiente manera:

<div id="esp">
                         Texto en Español
</div>

<div id="eng">
                         Text in English
</div>

Es importante que demos los "id" ya que con esos los vamos a identificar más adelante.

La lógica entonces es, si apretamos el botón para ir a la opción en inglés, se esconde el div de español y se muestra el de inglés.

Lo que vamos a hacer primero es buscar un botón tipo switch en internet, si es posible con CSS incluído para personalizarlo y agregarlo (o crearlo personalmente si prefieren).

Recomiendo la siguiente página que enseña como hacer un botón switch:
https://www.w3schools.com/howto/howto_css_switch.asp

Siguiendo el ejemplo de esa página, vamos a agregar el botón mediante HTML simplemente copiando y pegando en nuestro editor HTML.

Luego debemos copiar el diseño del CSS. Para esto necesitamos, dentro de nuestro editor, copiar el código dentro de etiquetas <style> </style>. A partir de ahí deberían poder ver el diseño del botón, de no ser posible, significa que primero hay que publicar el Post para poder verlo.


Lo último por agregar es el Script en Javascript pero primero volvemos al botón en su HTML que pegamos y  dentro de su etiqueta "<input .." colocamos: "onclick="myFunction()" " (sin los primeros "").

Con esto, le decimos al botón que cuando lo presionen ejecute la función "myFunction()" que vamos a crear ahora.

Para eso, debemos crear el código dentro de etiquetas <script> </script> en nuestro editor de HTML.

 Voy a compartir el código que utilizo:

<script>
function changeLanguage() {
    var x = document.getElementById('esp');
    var y = document.getElementById('eng');
    if (x.style.display === 'none') {
        x.style.display = 'block';
        y.style.display = 'none';
    } else {
        x.style.display = 'none';
        y.style.display = 'block';
    }
}
</script>

Lo que hace es, primero encontrar a los divs que antes marcamos como "esp" y "eng" y luego, al apretar el botón, mostrar uno y esconder el otro.


Como último detalle, falta esconder el lenguaje que queremos que este escondido por defecto. Tomando como ejemplo que quiero esconder el texto en Inglés, lo que hay que hacer es: dentro de div, agregar una propiedad de la siguiente manera:

<div id="eng" style="display:none;">

De esta forma, se le indica a esta división que este oculta al principio.

Eso fue todo, espero que les haya sido útil. Si utilizan la misma forma de dividir los textos al hacer sus Posts, la próxima vez solo tienen que copiar y pegar el HTML, CSS y Script del boton tal como esta para que funcione. (Pueden hasta copiar el HTML y el CSS de este botón si miran el código fuente de la página).

-L

lunes, 10 de octubre de 2016

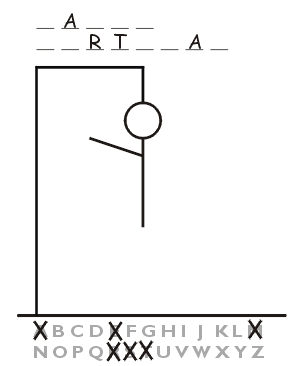
Crear un clon del Ahorcado en C


Español


Primero quiero aclarar que la 3era parte del proyecto de Generación Procedural de Circuitos de Carrera esta por salir. Todavía no funciona del todo pero empieza a dar resultados de a poco como el siguiente:


Pero ahora les traigo un trabajo práctico que tuve que hacer para una materia de programación. 

Vamos a recrear el juego del Ahorcado escrito en ANSI C, totalmente portable para Windows o Linux. (Nota: el juego va a ser desarrollado para Linux).

Las herramientas a usar son:
  •  Sublime Text
  • Compilador GCC

Los encabezados de las librerías que vamos a usar en todo el proyecto son:
  • stdio.h
  • stlib.h
  • time.h
  • string.h
  • ctype.h
Todo pertenecen a la librería estándar.


 Primero vamos a dividir en pasos que es lo que le programa va a hacer:
  1. Dibujar la pantalla inicial, la que va a contener al dibujo del ahorcado.
  2. Elegir de una lista de palabras una, de forma aleatoria.
  3. Pedir al usuario que introduzca una letra.
  4. Verificar si la letra pertenece o no a la palabra secreta, en caso de que si, reemplazar los espacios en blanco de la palabra secreta con la letra. Si no, dibujar una nueva parte del ahorcado.
  5. Repetir 4 hasta que se adivine la palabra o se haya dibujado a todo el ahorcado.
Para el dibujo del ahorcado lo que quería hacer es utilizar símbolos ASCII para dibujar como sería el peor caso:

/*    MATRIZ DIBUJO
   
          |
          |    Bye
          []
        --|--
          |     r
         / \    |
     ----------
   /            \

*/

Primero debemos dibujar la "MATRIZ DIBUJO" pero sin la persona. En mejor caso (que el jugador acierte todas las letras), esta no cambiaría.

ALTO y ANCHO son 2 constantes simbólicas que las calculé de acuerdo a cuantos caracteres ocupaba la matriz dibujo que hice arriba.

void
Dibujar(int m[ALTO][ANCHO]){
    for(int i = 0; i < ALTO_DIBUJO; i++){
        for(int j = 0; j < ANCHO_DIBUJO; j++){
            if( (i==0 || i==1) && j==6){
                m[i][j] = '|';
            }      
            else if(i==7 && j!=0 && j!= ANCHO-1){
                m[i][j] = '-';
            }
            else if(i==8 && j==0){
                m[i][j] = '/';
            }
            else if(i==8 && j==ANCHO-1){
                m[i][j] = '\\';
            }
            else if( i==4 && j==10){
                m[i][j] = 'r';
            }
            else if( (i==5 || i==6) && j==10){
                m[i][j] = '|';
            }
            else{
                m[i][j] = ' ';
            }
        }
    }
}
Se podría haber simplificado y simplemente en vez de tener los else if poner los correspondientes m[i][j] para cada caracter especial.

Para todos los demás caracteres que no forman parte del dibujo, los rellené con espacios.

Ahora vamos a la función errar.

A esta función se la llama si el jugador no acertó la letra. Se encarga de aumentar un contador de error "cant_err" y dependiendo de cuanto valga esta variable, dibujar una parte del ahorcado.

void
errar(int * cant_err, int m[ALTO][ANCHO]){
    (*cant_err)++;
    switch(*cant_err){
        case 1:
                m[2][6] = '[';
                m[2][7] = ']';
                break;
        case 2:
                m[3][6] = '|';
                m[4][6] = '|';
                break;
        case 3:
                m[3][7] = '-';
                m[3][8] = '-';
                break;
        case 4:
                m[3][5] = '-';
                m[3][4] = '-';
                break;
        case 5:
                m[5][5] = '/';
                break;
        case 6:
                m[5][7] = '\\';
                m[1][9] = 'B';
                m[1][10] = 'y';
                m[1][11] = 'e';
                m[6][10] = '/';
                m[5][11] = '/';
                m[5][10] = ' ';
                m[4][12] = 'r';
                m[4][10] = ' ';
                break;
    }
}

Ahora vamos con la función que verifica si la letra que ingresamos pertenece o no a la palabra:

int
verificar_letra(char * palabra_secreta, char letra, char * vec_resp){
    int flag=0;
    for(int i = 0; palabra_secreta[i]!=0; i++){
        if(palabra_secreta[i] == letra){
            vec_resp[i] = letra;
            flag=1;
        }
    }
    return flag;
}

Como podrán ver, esta función nos retorna 1 si la letra estaba en la palabra secreta y 0 si no lo estaba. Además, le asigna la letra a un vector llamado "vec_resp".

El vector "vec_resp" es un vector que tiene la misma dimensión que la palabra secreta que se elija, su función es llenarse con "*" para mostrárselo al usuario y que, si este acierta, se reemplace con la letra correspondiente.

Para crear este vector utilizamos la función "Crear_vector_Respuesta":

char *
Crear_vec_respuesta(char * palabra_secreta){
    int i=0, j;
    char *p;
    while(palabra_secreta[i]){
        i++;
    }
    p = malloc(i);
    for( j =0 ; j< i;j++){
        p[j] = '*';
    }
    p[j] = 0;
    return p;
}

La mejor forma de hacerlo es creando un vector de forma dinámica, pues no sabemos la longitud de la palabra que se va a elegir aleatoriamente. Entonces la función calcula la longitud de la palabra que se eligió y crea un vector de esa dimensión lleno de "*".

Ahora lo que quiero hacer es dibujar en cada paso la "MATRIZ DIBUJO". Si el jugador falla, la función "errar" cambiará la matriz pero esta va a simplemente imprimirla. Esta función también va a imprimir al "vector respuesta".

void
Imprimir_pantalla(int m[ALTO][ANCHO] char *vec_resp, char *usadas){
    LIMPIAR_PANTALLA;
    printf("\n");
    for(int i = 0; i < ALTO; i++){
        printf("\t\t");
        for(int j = 0; j < ANCHO; j++){
            printf("%c", m[i][j]);
        }
        printf("\n");
    }
    printf("\n\n");
    printf("\t    \t");
    for(int i = 0; vec_resp[i] != 0 ; i++){
        printf("%c ", vec_resp[i]);
    }
    printf("\t    \t \n");
    printf("\t Usadas: ");
    for(int i = 0; usadas[i] != 0 ; i++){
        printf("%c ", usadas[i]);
    }

    printf("\n");
    LIMPIAR_PANTALLA;
}

 Donde  LIMPIAR_PANTALLA es una macro que simplemente contiene un printf con varios "\n" dentro.

Esta función lo que hace es recorrer todos los vectores e imprimir sus valores como caracteres. La tabulación es simplemente por presentación. 

Lo importante de usar tantos espacios en blanco es para que, al imprimir la pantalla luego de que el jugador introdujo una letra, no pueda ver los "restos"  de las impresiones previas.

Lo último de esta función también utiliza un vector llamado "usadas", este vector es simplemente un vector de longitud 6 (lo máximo que puedo fallar es 6 veces, cuando se dibujó todo) en donde se irán mostrando las letras incorrectas que ya usamos.

Finalmente, la función main se encarga de inicializar los vectores y de controlar el ciclo principal del juego.

int
main(void){
int Matriz_Dibujo[ALTO][ANCHO], cant_err=0, k, w_used=0, h=0;
char lett;
char *palabras[5]={"ARBOL", "CASA", "AUTO", "JUEGOS", "COMPUTADORA"};
char * palabra_secreta, *vec_resp, usadas[7];
    srand(time(NULL));
    while(usadas[h]!=0){
        usadas[h]=0;
        h++;
    }
    palabra_secreta = palabras[rand()%5];
    Dibujar(Matriz_Dibujo);
    vec_resp = Crear_vec_respuesta(palabra_secreta);
    Imprimir_pantalla(Matriz_Dibujo, vec_resp, usadas);
    do{
        lett = toupper(getchar());
        getchar(); //para quitar el \n //IMPORTANTISIMO
        k = verificar_letra(palabra_secreta, lett, vec_resp);
        if(k){
            Imprimir_pantalla(Matriz_Dibujo,vec_resp, usadas);
        }
        else{
            usadas[w_used++] = lett;
            errar(&cant_err, Matriz_Dibujo);
            Imprimir_pantalla(Matriz_Dibujo, vec_resp, usadas);
        }
    }while((lett='\n') && (cant_err != 6) && (strcmp(palabra_secreta,vec_resp)!=0) );
    if(cant_err==6){
        printf("You Lose! the answer was %s \n", palabra_secreta);
    }
    if((strcmp(palabra_secreta,vec_resp)==0)){
        printf("You Win!!! \n");
    }
    return 0;
}

Primero definimos las variables que vamos a utilizar, puse también uno algunos ejemplos de palabras secretas para probar como funciona.

Después, inicializamos al vector "usadas" con todos ceros. Se podría haber hecho en otra función para mantener mejor estilo.

Luego, elejimos la palabra secreta siendo esta un elemento random de nuestro vector "palabras" y llamamos a la función Dibujar para crear el "setting" inicial para nuestro juego.

Creamos nuestro vector respuesta utilizando la función "crear_vec_respuesta" e imprimimos por primera vez la pantalla.

A partir de acá comienza el ciclo.

Se le va a pedir al usuario un caracter. Se va a utilizar la función verificar y a partir de ahí se va a determinar si se reescribe nuestro vector "respuesta", indicando que acertamos o si se modifica el vector "usadas" y se modifica la "matriz dibujo", indicando que erramos.

El ciclo se va a repetir mientras el caracter ingresado no sea un "enter", mientras la cantidad de errores no sea 6 (nuestro máximo) y mientras la palabra secreta sea distinta a la palabra secreta (utilizando la función string compare (strcmp)).

Luego, los if están para indicar si salimos del ciclo por que perdimos o por que ganamos.

Lo más importante del ciclo es: luego de pedirle al jugador un caracter con getchar(), hacer OTRO getchar(), para consumir el "\n" (el enter) del buffer, ya que si no, el ciclo se va a volver a ejecutar haciendo de cuenta que el caracter que ingresó el usuario es un enter.


Y eso es todo. 

Si quieren, pueden agregarle más palabras al conjunto de "palabras" para que sea más entretenido (y después cambiar el rand()%"nueva_cant_de_palabras" de la 10° línea del main).


Cualquier duda o sugerencia para optimizar pueden dejarla en los comentarios.

-L


miércoles, 27 de julio de 2016

Como crear un fondo rotativo para Infinite Runners en Unity | How to create a scrolling background for Infinite Runners in Unity


Español | English


En este tutorial voy a enseñar como crear un fondo rotativo, esto es, un fondo que se mueva a medida que el jugador avanza. Este tutorial esta pensado para los juegos de estilo Infinite Runner, por lo tanto, se toma en cuenta que:
  1. El jugador siempre esta en movimiento
  2. El movimiento del jugador es constante

Aunque también se va a ver como crear este fondo para los casos en los que nuestro jugador este quieto o nuestro jugador haya variado la velocidad. Este tutorial sirve tanto para juegos 2D o 3D

Primero necesitamos un fondo, para ser más ilustrativo, voy a usar imágenes muy simples.


Este fondo de barras va a ser lo que vamos a utilizar, el hecho de que haya un rectángulo rojo es para poder distinguir mejor, nuestro fondo puede tener algún elemento que sea distintivo y sirva para marcar (un árbol, un edificio, etc).


Lo que vamos a hacer es importar esta imagen a Unity y asignarla como "Textura". Luego vamos a modificar el "Wrap mode" que por default esta en "Clamp" hacia "Repeat".

 Lo siguiente que vamos a hacer es crear un nuevo Material. Para eso vamos a dar clic derecho en el inspector/crear/material al que vamos a nombrar "fondo".Lo próximo va a ser modificar el Shader este nuevo material, lo queremos en Texture, para eso vamos a seleccionar de menú desplegable donde dice "Shader" y elegir "unlit/Texture"


Y arrastramos el fondo que importamos hacia el cuadrado al costado para indicarle al material su textura. Lo próximo es crear un Quad en el inspector, que va a ser donde vamos a colocar nuestro fondo, para eso vamos a GameObject/3D Object/Quad. Si queremos podemos remover el componente "Mesh Collider" de este, ya que no lo vamos a utilizar.

Luego, hay que asignarle a este Quad el nuevo material que creamos con nuestro fondo, para eso, seleccionamos al Quad y arrastramos el material que creamos hacia la pestaña Mesh Renderer/Materials/Element0 y luego podemos agrandar o achicar el Quad para que muestre lo que queremos del fondo.

La siguiente parte es de programación, lo que vamos a hacer es modificar el Offset del eje X del material dentro del Quad, eso va a rotar la imagen. A continuación muestro una imagen sin offset y una imagen con Offset:

Sin Offset (el fondo original):


Imagen con Offset;


Como podemos ver, la imagen se "corrió" hacia el costado y como a la derecha de la imagen no hay nada, se repite la imagen de nuevo, si este offset es continuo, se crea el efecto de que el fondo se esta moviendo.

Vamos a crear un Script llamado "Background_scroll" 

primero empezamos declarando las variables que vamos a utilizar:

public MeshRenderer mr;
public float scroll_vel = 0.4f; //el valor se pude cambiar a lo que más convenga.

Si se quiere simplemente que el fondo se mueva infinitamente sin importar que el jugador este quieto o no debemos escribir dentro de Update():

mr.material.mainTextureOffset = new Vector2( (Time.time * scroll_vel)% 1, 0);

lo que hace esto es indicarle al Mesh Renderer del Quad que su Material va a tener un offset de Time.time * scroll_vel  % 1

La parte más importante de todo está en el "%1", ya que Time.time va a ser cada vez más grande y lo que nosotros queremos es crear un offset entre el valor 0 (no offset) a 1 (una vuelta completa) por eso, se utiliza la congruencia con módulo 1 (los restos de dividir Time.time *scroll_vel con 1), ya que siempre van a estar entre 0 y 1.

Como dije antes, si solo se quiere que el fondo se mueva constantemente sin importar el jugador, ese es el código, faltaría únicamente desde el inspector arrastrar el Script hacia el Quar y arrastrar al Quad hacia "Mesh Renderer" para que se agarre a si mismo.

Si queremos que la velocidad varíe, necesitamos conocer la velocidad, para eso voy a asumir que la velocidad del jugador esta con acceso public static, en un Script "jugador". Entonces lo que haremos es modificar scroll_vel dependiendo de la velocidad del jugador.

declaramos la variable vel en Update(), ya que necesitamos que se actualice constantemente
vel = jugador.velocidad //referencia hacia una variable que indica la velocidad del jugador

Y simplemente, dentro de Update vamos a crear unos Ifs para variar dependiendo de la veloidad

If ( vel == 0 ){
    scroll_vel = 0; //para detener el scroll.
}

Por último, si la velocidad varía, por ejemplo que sea mayor a 0 y menor a 1, vamos a hacer decaer scroll_vel progresivamente. Para esto vamos a utilizar la función Mathf.Lerp(valor inicial, valor final, intervalo de tiempo).

If (vel > 0 && vel < 1)
{
    scroll_vel = Mathf.Lerp(0.4f, 0.2f, 0.5f); //hace decaer scroll_vel de 0.4 a 0.2 progresivamente
}

Debemos utilizar la función Lerp ya que no podemos utilizar cambios bruscos en la velocidad en la cual el fondo se rota.

Y eso es todo, con esto tenemos nuestro fondo rotativo para Infinite Runners.


-L


-----------------------------------------------------------------------------------

English


In this tutorial I'm going to teach how to create a scrolling backgound, this is, a background which scrolls as the player advances the level. This tutorial was thought for Infinite Runner games, so I take into consideration that:


  1. The player is always moving
  2. The movement speed is constant
Although it will also teach how to do for the case that our player isn't moving or his/her speed varies. This is both for 2D and 3D games

We first need a background, to keep things simple, I'm going to use very simple images:


This bar background will be the one we are going to use, the fact that it has a red rectangle is only to make very visible when we scroll it, your background may have a distinctive element that may be used for this (a tree, a building).

What we are going to do is to Import this image into Unity and assign it as a "Texture". Then, we are going to modify the "wrap mode" which by default is "Clamp" to "Repeat".

The next thing we are going to do is to create a new Material. For that we right click in the inspector/create/Material and we name it "Background". Next, we need to modify the Shader of this new material, we want it in Texture, for that we select from the drop down menu of Shader Unlit/Texture


And we drag the background that we imported to the square at the right to indicate the material its texture. Then we create a Quad in the Inspector, which will be use to place the background, for that we go to GameObject/3D Object/Quad. We can if we want, remove the "Mesh Collider" as we won't use it.

Next, we need to assign the Quad the Material which we created earlier, for that, we select the Quad and drag the Material to where it says "Mesh Renderer/Materials/Element0" and then we can adjust the size of the Quad to let it display the whole background.

The following part is about programming, what we are going to do is to modify the Offset of the X axis of the material inside the Quad, that will scroll the image. I'll now show you the background without offset and with offset:

Without Offset (the original background):


With Offset:


As we can see, the image "scrolled" to the side and as there is nothing at the right of the image, it began to repeat itself, if this offset effect is constant, we can create the effect that the image is scrolling.

Now we create a Script called "Background_scroll"

We first start declarating the variables we are going to use:

public MeshRenderer mr;
public float scroll_vel = 0.4f; //the value in here can vary to whatever you like

If you simply want to scroll the background infinitely without taking care if the player is still or not, we need to write this inside Update():

mr.material.mainTextureOffset = new Vector2( (Time.time * scroll_vel)% 1, 0);

What this does is to tell the Mesh Renderer of the Quad that his Material will have an offset of Time.time * scroll_vel  % 1

The most important part is in the "%1", as Time.time will always be increasing and what we want is to create an offset between 0 (no offset) to 1 (a full turn) that is why the congruence with module 1 is used ( the remainder of dividing Time.time * scroll_vel with 1) as they will always be between 0 and 1.

As I said before, if what you only want is the background to move constantly without taking care if the player is moving or not, that's the code, what it only needs to do left is to drag the Script from the inspector to the Quad and then drag the Quad to itselft where it says "Mesh Renderer" on the Script component.

If we want speed to vary, we need to know the player's current speed, for that I'm going to assume that the players velocity is in a public static float named velocity in a Script called "player". Then what we need to do is to modify scroll_vel depending the speed of the player.


We declare the variable vel in Update(), as we need it to be constantly updating

vel = player.velocity //reference to a value in the player script that indicates the player speed

We then simply make, inside the Update() function some Ifs statements to vary scroll_vel depending on the player's speed


If ( vel == 0 ){
    scroll_vel = 0; //to stop the background from scrolling
}

Lastly, if the player's speed varies, for example is bigger than 0 but less than 1, we need to reduce scroll_vel progresivelly. For this we are going to use the function Mathf.Lerp(initial value, final value, time interval).

If (vel > 0 && vel < 1)
{
    scroll_vel = Mathf.Lerp(0.4f, 0.2f, 0.5f); //reduces in a progressive way the value of scroll_vel
}

We need to use the Lerp function as we can't make abrupt changes to the speed in which the background is scrolling.

And that's all, with this we have our scrolling background for our Infinite Runners


-L

jueves, 23 de junio de 2016

Como crear textos al agarrar objetos en tiempo real en Unity | How to create texts when grabbing objects in real time in Unity

Español | English


Un efecto clásico. En muchos juegos de Arcade o de plataforma tenemos este pequeño detalle que tal vez algunos ignoran, un pequeño texto cuando agarramos un objeto (o un simple "+1" al agarrar una moneda). Así que me decidí por averiguar cómo funciona.

La idea básica es simple: hacer que un texto se muestre cuando el jugador colisione con cierto objeto, el texto debía aparecer un poco más arriba del jugador para poder apreciarlo bien. Pero también, el texto debía aparecer un poco más adelante, ya que el jugador esta constantemente en movimiento, por lo que el texto va a estar, adelante y por arriba del jugador.

¿Pero cómo le decimos donde aparecer al texto, si en Unity el GUI y el "mundo" se manejan por separado? Para aclarar el problema, si un objeto esta en la posición 100 horizontal, no hay forma de llevarle esas coordenadas al texto que va a aparecer en la interfaz. Además se suma el hecho de que la cámara se mueve constantemente con nosotros.

Para esto debemos ajustar algunas propiedades del Canvas. El Canvas es el lugar en donde tienen que estar los elementos del GUI (como los botones o textos, etc). Estos se pueden crear y hasta tener más de uno en la misma escena. (Nota: Al crear un botón o cualquier elemento del GUI, Unity por defecto crea un Canvas si no había uno existente).

Luego de modificar el Canvas vamos a crear una "Sorting Layer" y finalmente, vamos, por código, a indicarle al texto donde tiene que aparecer.


La opción que vamos a cambiar es "Render Mode". Vamos a utilizar la opción "Screen Space- Camera", lo que hace cada opción de la lista es ofrecernos distintas formas en las que podemos utilizar el Canvas; si queremos que este por encima de la cámara, si queremos que este fija en el espacio del juego o si queremos que trabaje en el espacio de la cámara.

Lo que vamos a hacer nosotros es trabajar en el espacio de la cámara. Lo siguiente será arrastrar nuestra cámara a la casilla de "Render Camera" para asignarla.


Las Sorting Layers son capas de prioridades, se usan principalmente para indicar que elementos se muestran al fondo y cuales más adelante. Hacemos Click en Sorting Layer y luego en "Add Sorting Layer".

Primero clickeamos en el "+" y luego la nombramos, finalmente debemos volver a la propiedad de Canvas para asignarle esa capa que le creamos.

El Canvas esta listo. Este trabajo fue hecho para que el Canvas trabaje en el espacio del juego pero los elementos que muestre estén "una capa adelante", con lo cual no se va a superponer con otros objetos del juego.

Lo siguiente a hacer es crear dentro de este Canvas un texto de UI, haciendo click derecho en el Canvas/UI/Text.

Por último, vamos a crear el Script que le va a indicar a ese texto donde tiene que aparecer y que tiene que decir.

Las variables a utilizar son:

Public Text cartel;
(Nota: Luego hay que arrastrar un elemento Texto a la casilla de la variable pública)

Voy a utilizar un corutina por 2 razones: 
  1. Quiero poder llamar a esta función poniendo como parámetro el texto que quiero que muestre.
  2. Quiero crear un delay para que el texto no desaparezca enseguida.


IEnumerator Show_Sign(string texto)
    {
        cartel.gameObject.SetActive(true);
        cartel.text = texto;
        cartel.color = new Color(1, 1, 1, 1);
        cartel.gameObject.transform.position = new Vector3(player.position.x + 1, player.position.y + 1, 0);
        yield return new WaitForSeconds(0.2f);
        cartel.gameObject.SetActive(false);
     }

La función se basa en activar y desactivar el texto que habíamos creado, luego le dice cual es el texto que tiene que mostrar y le asigné el color blanco. Luego, le indico que tiene que estar 1 unidad más arriba y adelante de la posición del jugador. Por último, le digo que haga un delay hasta la próxima instrucción que es para desactivar este texto.

Lo que no quería hacer era tener que crear y eliminar el texto cada vez que el jugador agarra un objeto, ya que consumía muchos recursos, por eso, es más preferible ya tenerlo creado y simplemente activarlo o desactivarlo.

Ahora podemos llamar a la corutina indicándole que texto mostrar de la siguiente manera:

StartCoroutine(Show_Sign("Calculator!"));

Y así queda creado este efecto clásico pero muy interesante que aporta un agregado más al diseño del juego en general.


-L


------------------------------------------------------------------------------------------

English

A classic effect. In many Arcade or platform games, we have this small detail that many can ignore, a small text when we grab an object ( or a simple "+1" when we grab a coin). So I decided to figure out how it works.

The basic idea is simple: Make a text show when the playe collides with a certain object, the text should appear a little higher than the player so it can be seen clearly. But also, it has to be a little bit more forward as the player is constantly moving. So the text is going to be placed higher and a bit forward than the player.

But how do we tell the text where to go, if in Unity the GUI and the "world" work on different spaces? To make the problem more clear, lets say there is an object in the horizontal position 100, there is no way to send the coordinates to the text which is going to appear on the interface. Plus, there is the fact that the camera moves following the player.

So we need to make some few changes to some of the properties of the Canvas. The Canvas is the place where the elements of the GUI (such as buttons, text, etc) have to be. This can be created and the same scene can have multiple Canvas. (Note: When creating a button or any GUI element, Unity by default creates a Canvas if didn't exist).

After having done the modifications to the Canvas, we are going to create a "Sorting Layer" and finally, by code, we are going to indicate the text where it should appear.


The option we are going to change is "Render Mode". We are going to use the option "Screen Space- Camera", what each option of the list does is to offer us different ways in which we can use the Canvas; if we want it to be above the camera, or we want it with fixed position in the game space or we want it to work in the same space of the camera.

What we are going to do is to work in the same space of the camera. The next thing is to drag the camera to the "Render Camera" box to assign it.

Sorting Layers are layers of priorities, they are used mainly to indicate which elements go to the background and which elements will be above those of the background. We click in Sorting Layers and then in "Add Sorting Layer".


First we click the "+" and then we name the layer, finally we go back to the properties of the Canvas and assign the layer we have just created.

The Canvas is ready. This job was done to allow the Canvas to work in the same space than the camera but making the elements of the Canvas be on a different layer, this will avoid the collision between the elements of the GUI and the rest of objects of the game.

The next thing to do is to create inside the Canvas, a UI text, making right click on Canvas/UI/Text.

Finally, we are going to create the Script that will indicate the text where it should go and what to say.

The variables I'm going to use are:

Public Text mysign;
(Note: Later on, a Text element has to be dragged to the public variable box)

I'm going to use a coroutine because of 2 reasons:

  1. I want to call this function with the text I want to show as a parameter.
  2. I want to create a delay so that the text doesn't disappear right away.


IEnumerator Show_Sign(string mytext)
    {
        mysign.gameObject.SetActive(true);
        mysign.text = mytext;
        mysign.color = new Color(1, 1, 1, 1);
        mysign.gameObject.transform.position = new Vector3(player.position.x + 1, player.position.y + 1, 0);
        yield return new WaitForSeconds(0.2f);
        mysign.gameObject.SetActive(false);
     }


The function is based on toggling on and off the text which we have created, it laters tells the text what should say and I make it white. Then, I tell the text that it should be 1 unit more high and forward than the player's position. Finally, I create a delay for the next instruction, which is to deactivate the text.

What I didn't want to do was to create and eliminate the text every time the player grabs an object, as it would consume a lot of resources, that is why, it is better to have the text already created and simply activate it or deactivate it.

Now, we can call the coroutine indicating what we want it to say:

StartCoroutine(Show_Sign("Calculator!"));

And this is how we create this classic but very interesting effect which adds its own value to the general game design.

-L

martes, 14 de junio de 2016

Como crear trayectoria Senoidal para un objecto por Código | How to create a Sinusoidal trajectory to an object by Script

Español | English

Muchas escuchamos o hicimos la pregunta a nuestro/a profesor/a de matemáticas: "¿Voy a usar esto en el futuro?" y tal vez el o ella no sabía que responder, seguro les contestaba que dependía de la carrera que el alumno o la alumna fuera a seguir.

Para el desarrollo de Videojuegos se utiliza toda herramienta posible de las matemáticas, ya que nos pueden servir para resolver los casos que se nos planteen. Por eso es importante tener un amplio conocimiento de las ciencias exactas para tener más herramientas disponibles.

La situación de la cual partimos se genera a partir de un objeto que se mueve en línea recta a velocidad constante. Este objeto es uno de los encargados de instanciar (Spawnear) otros objetos, que el jugador va a recolectar.

Ya había hablado antes de que el Spawner instancia objetos en intervalos aleatorios de tiempo, pero siempre en linea recta. Por lo que nos podemos quedar quietos en una misma posición y siempre agarrar objetos.

Una solución a este problema es cambiar la posición vertical ("altura") del Spawner constantemente, para que genere objetos a distintas "alturas" y así, cubrir más superficie del mapa. Al moverse verticalmente de arriba hacia abajo y con velocidad constante, podemos ver que la trayectoria del Spawner va a crear una forma senoidal.

Para eso primero creamos las variables que van a actuar:

float distancia = 0.13f;
public float h = 0;
public float hmax = 0;
public float hmin = 0;
public bool up = true;

Donde h representa la altura del objeto, se actualiza constantemente, hmax y hmin representan la altura máxima y mínima que puede tomar ese objeto, y por último, "up" determina si tiene que subir o no.

Las variables hmax y hmin tienen que estar asignadas en la función Start() del Script, ya que no deberían cambiar.

void Start(){
hmax = 30f;
hmin = 1f;

}

Ahora vamos a focalizarnos en la función Update(). Primero, vamos a asignarle a la variable h el valor de la posición vertical del Spawner, luego vamos a indicarle si debe subir o bajar.

h = this.GetComponent<Transform>().position.y;

Nota: Se asume que el Script esta añadido al objeto, de no ser así, se debería crear una variable pública de tipo Transform a la cual le pondremos los valores del objeto.

if (up == true)
        {
          this.gameObject.GetComponent<Transform>().position += new Vector3(0, distancia, 0);
        if (h >= hmax)
        {
            up = false;
        }
        }
        if (up == false)
        {
           this.gameObject.GetComponent<Transform>().position -= new Vector3(0, distancia, 0);
        }
        if(h <= hmin)
        {
            up = true;
        }

Aquí esta la lógica del movimiento. Se basa en analizar si el objeto tiene que subir o bajar, en caso de que tenga que subir, se actualiza constantemente su posición vertical hasta que alcanzó el límite, luego, se le indica que debe bajar y de nuevo se modifica la posición vertical. Esto se lleva a cabo infinitas veces.

Se puede, como complemento, ajustar la velocidad a la que se desplaza o agrandar el intervalo.Y así queda creada la mecánica para hacer que un objeto recorra una trayectoria senoidal.


-L

--------------------------------------------------------

English

Many times we have heard someone ask (or did it ourselves) to the teacher: "Am I going to use this in the future?" and maybe the teacher didn't know what to answer, they surely said that it depended on what the student was going to do when he or she grow up.

For Game development, we use every available tool from math, as they can be useful to solve cases that may appear. That is why we need to have a wide range of knowdledge from the exact sciences to have as many tools as possible.

Our starting situation is generated by and object that moves in straight line with constant speed. This object is one of many who instantiates (Spawns) the objects that the player will collect.

I've spoken before about the Spawner, saying that it instantiates in random periods of time, but always in straight line. So we can stand still in a fixed position and alwats grab objects.

A solution to this problem is to change the vertical position ("height") of the Spawner constantly, so that it generates the objects in different "heights", which will cover more surface of the map. As the object moves up and down and it is also moving at a constant speed horizontally, we can see that this creates a sinewave trajectory.

To do this we first need to create the variables that will act:

float distancia = 0.13f;
public float h = 0;
public float hmax = 0;
public float hmin = 0;
public bool up = true;

Where h represents the height of the object, which is constantly being updated, hmax and hmin represent the maximum and minimum height that the object can have, finally, "up" determines whether  the object has to go up or not.

The variables hmax and hmin have to be assign in the Start() function of the Script, as they are not meant to be modified.


void Start(){
hmax = 30f;
hmin = 1f;
}

Now we are going to focus on the Update() function. First of all, we need to assign the vertical position of the object to the variable h, then we are going to indicate if it needs to go up or down.

h = this.GetComponent<Transform>().position.y;

Note: I assume that the Script is attached to the gameObject, if this is not the case, a public variable of the type Transform needs to be created and later on, it has to be assign to an object.

if (up == true)
        {
          this.gameObject.GetComponent<Transform>().position += new Vector3(0, distancia, 0);
        if (h >= hmax)
        {
            up = false;
        }
        }
        if (up == false)
        {
           this.gameObject.GetComponent<Transform>().position -= new Vector3(0, distancia, 0);
        }
        if(h <= hmin)
        {
            up = true;
        }

Here it is the logic of the movement. It is based on analyzing whether the object has to go up or down, in case it has to go up, its vertical position is being constantly updated until the limit is reached, then, it indicates the object that it has to go down and it modifies the vertical position again. This is performed infinite times.

As a complement, one can also adjust the speed on which it moves or make the periods longer. And so it is created the mechanic that make an object travel a sinusoidal trajectory.

-L